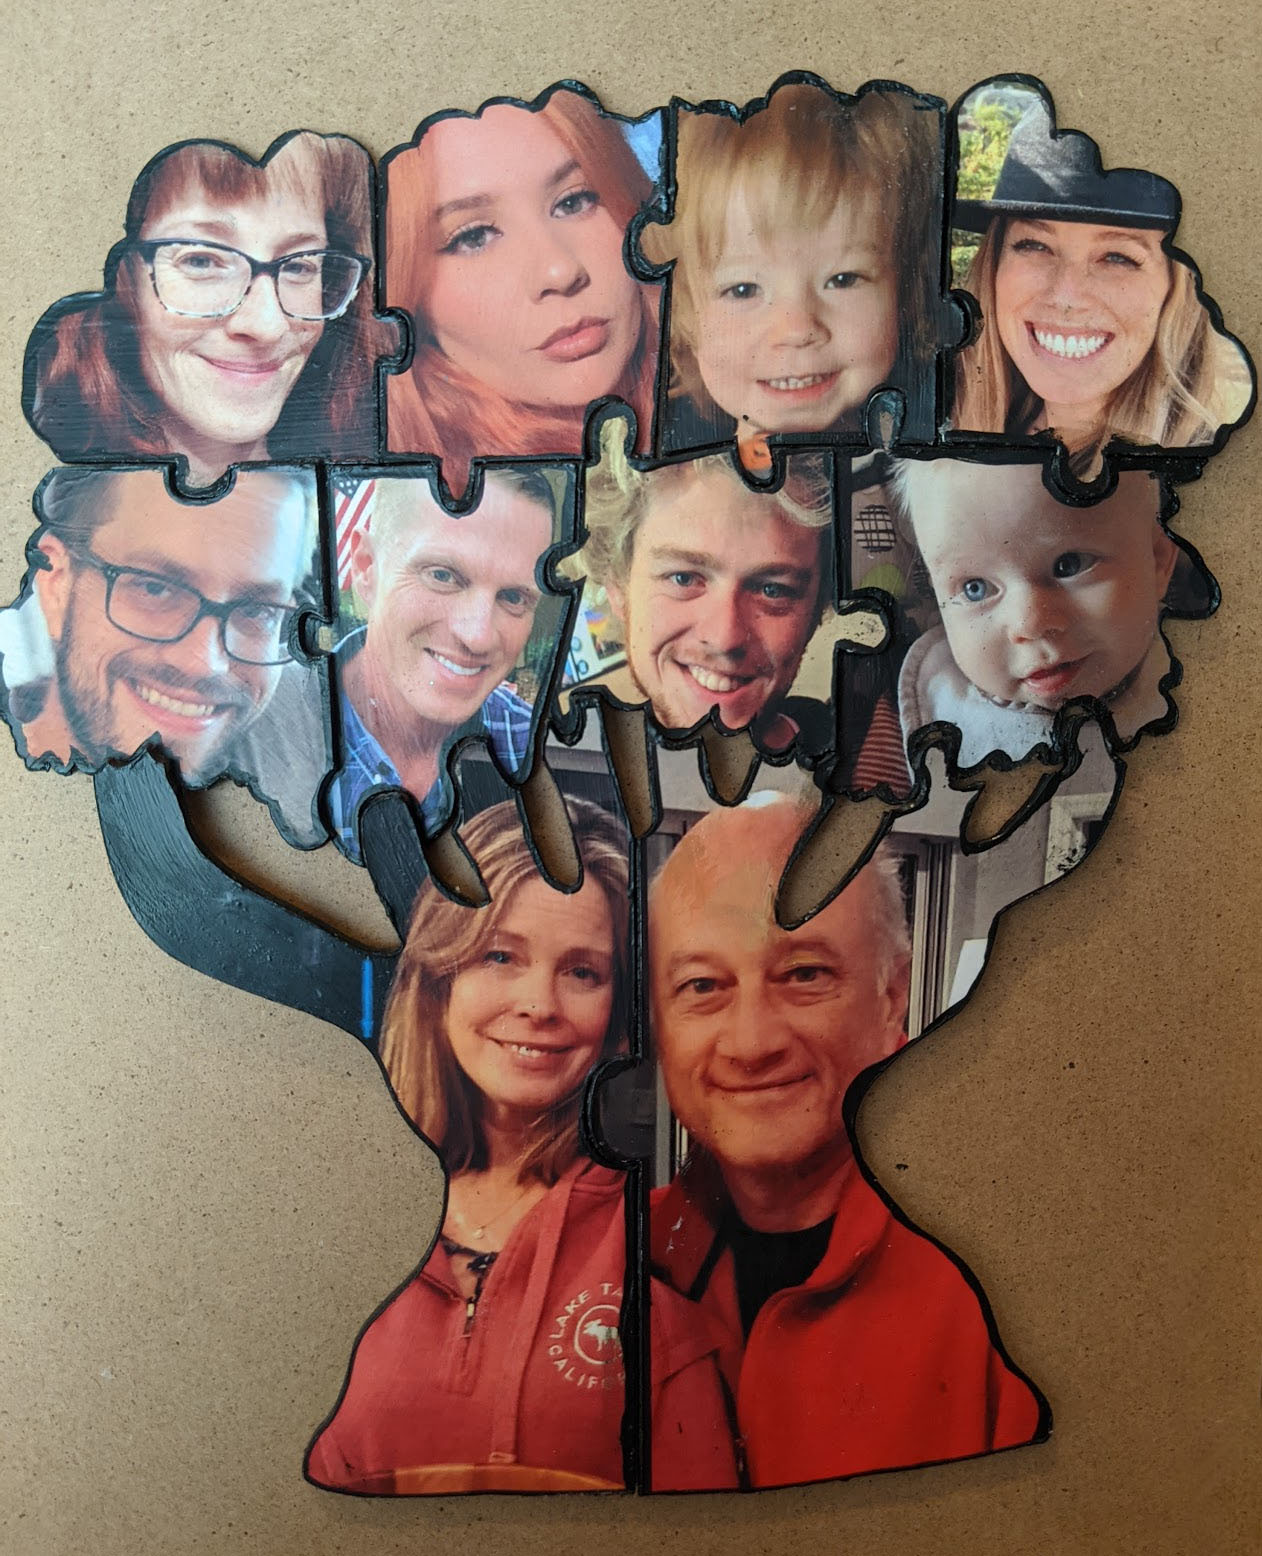
This was a fun project! There’s definitely some things I would have done differently. Sometimes though, you have to let your ego go and listen to the advise of others to grow as an artist, and other times you probably should have just gone with your gut. REGARDLESS. It was a fun experiment with my cricut cutter. If you want to do this project, I advise you attach your printed puzzle pieces to your chipboard BEFORE you cut, OR you could do what I originally wanted to do and use thin wood and Modge Podge photo transfer medium. The problem is that puzzles need to fit together JUST RIGHT. And when I glued each individual piece of paper to the puzzle piece, it altered the puzzle piece ever so slightly, so the pieces didn’t click together. Total ASMR fail. But here is how this one was made:
Materials:
- Cricut Maker
- Printer (laser if you are doing the photo transfer version)
- Photopaper (I think you have to use standard printer paper for phototransfer version)
- Chipboard (or wood)
- Modge Podge (Use photo transfer if you want to do it that way! Or get the finish that you want for your puzzle.)
- Illustrator or another vector based program
- Photos on your computer of the family you are using!
Steps:
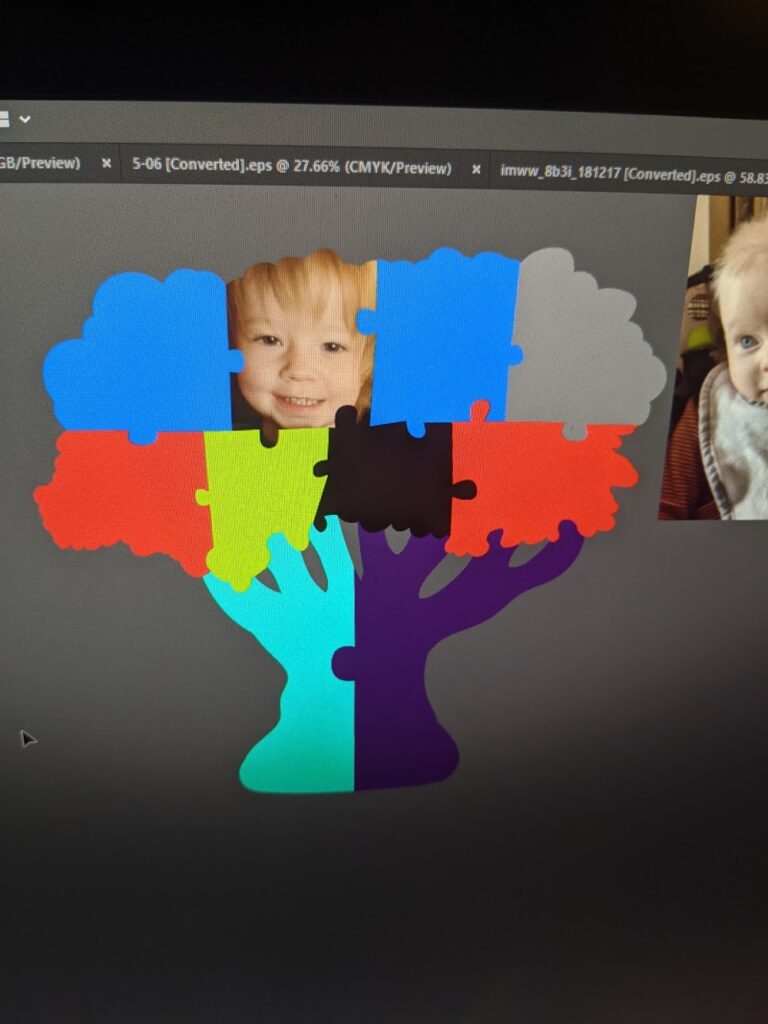
Step 1 : If you are interested in downloading my .eps file, send me a line! Otherwise, make yourself a puzzle on illustrator! It’s as easy as drawing out your main shape in illustrator, then making one puzzle piece at a time fit the surrounding ones using the cut out tool in your properties panel. You can really only do one side at a time, so be patient.
Step 2 : Find all your photos and size them to how big you want them to print.
Chipboard Version
Step 3 : Mask each photo to the shape of the puzzle piece. Give yourself some bleed if you don’t want to struggle with cut lines being exact.
Step 4 : When setting up your cut file, make sure you line up to the placement on your printout. Some printers are total jerks and don’t print exact. Cricut won’t cut exactly where you want it to either, but there is an excellent tutorial here to deal with that.
My Way
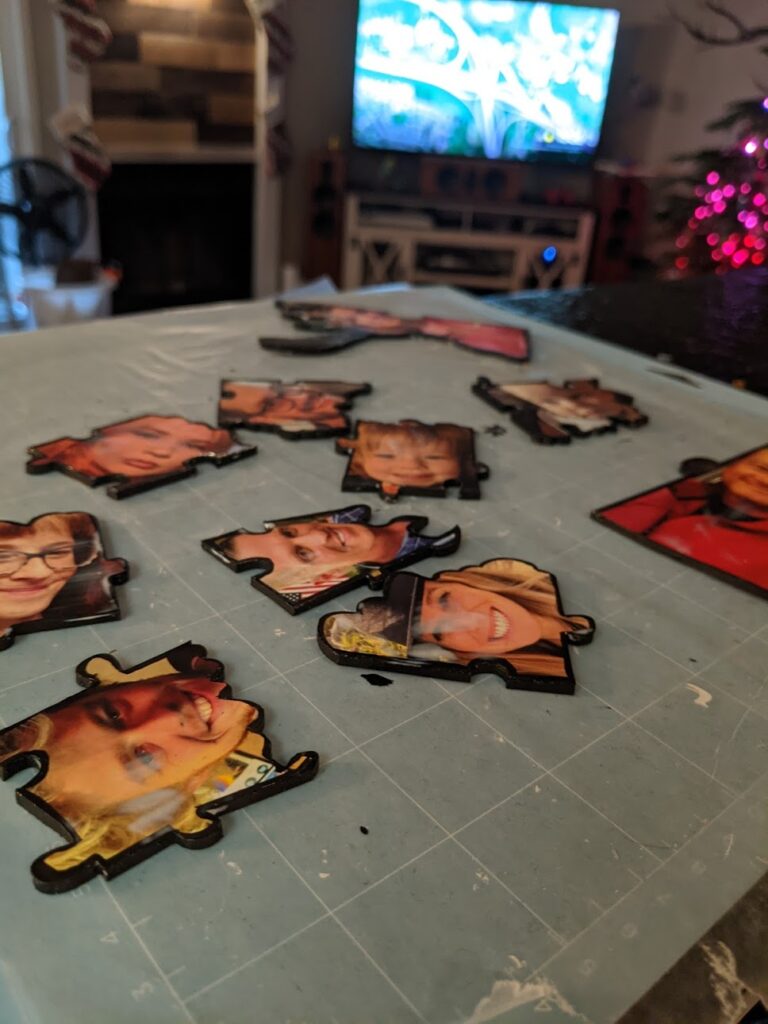
Step 5 : Cut your paper and your chipboard separately. This process is a lot of trial and error. Prepare yourself to get frusterated. Tea, breathing, cannabis, whatever gets you centered… try not to break your computer. The robots ARE listening and are taking note to who is a mean for the eventual uprising.
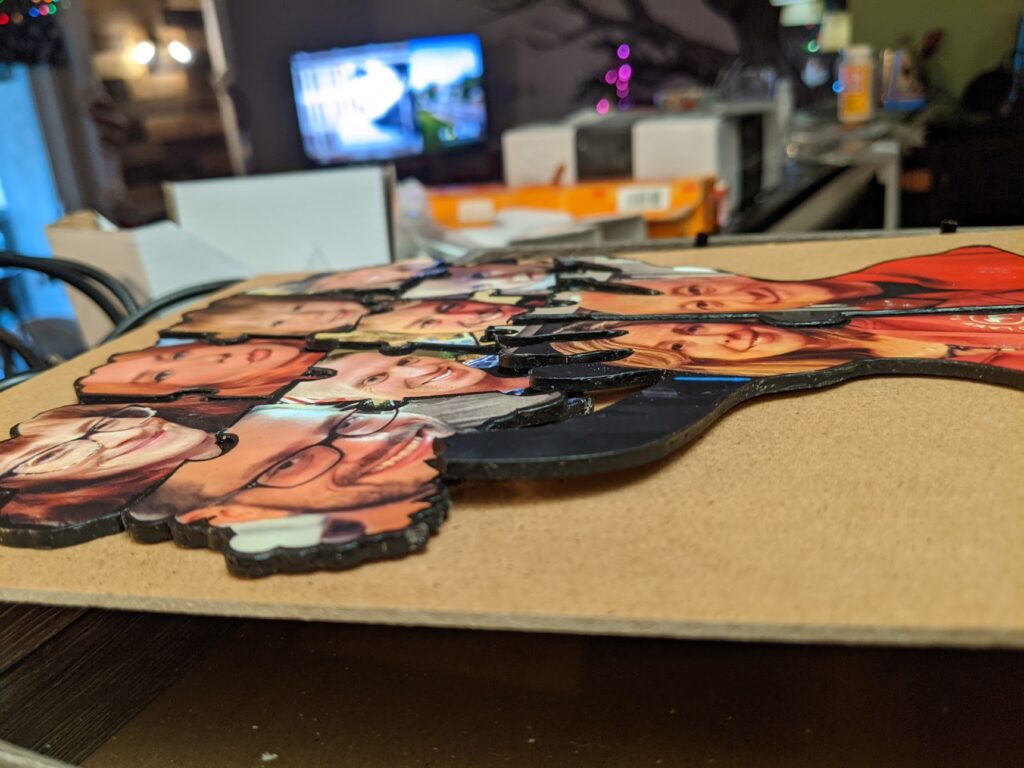
Step 6 : Assemble the pieces together and try not to make the glue too heavy.
Better Way
Step 5 : Attach the paper to your chipboard. Just a light layer of modge podge will do it. Try to keep it nice and flat and work out any air bubbles carefully.
Step 6 : Cut!
Transfer on Wood Version
Step 3 : Flip your images so they will read correctly when transferred.
Step 4: Print all your photos
Step 5 : Cut out your pieces of wood with the Cricut, yes, it will take a while. A VERY long while. Think a couple hours.
Step 6 : Follow the instructions on your transfer glue. This will take a night to settle!
Step 7: TADA (Let me know how this works because I haven’t tried it yet. BUT this was the original plan and I’m obsessed with it and also too bummed to try it out right now.)