
Quick Note:
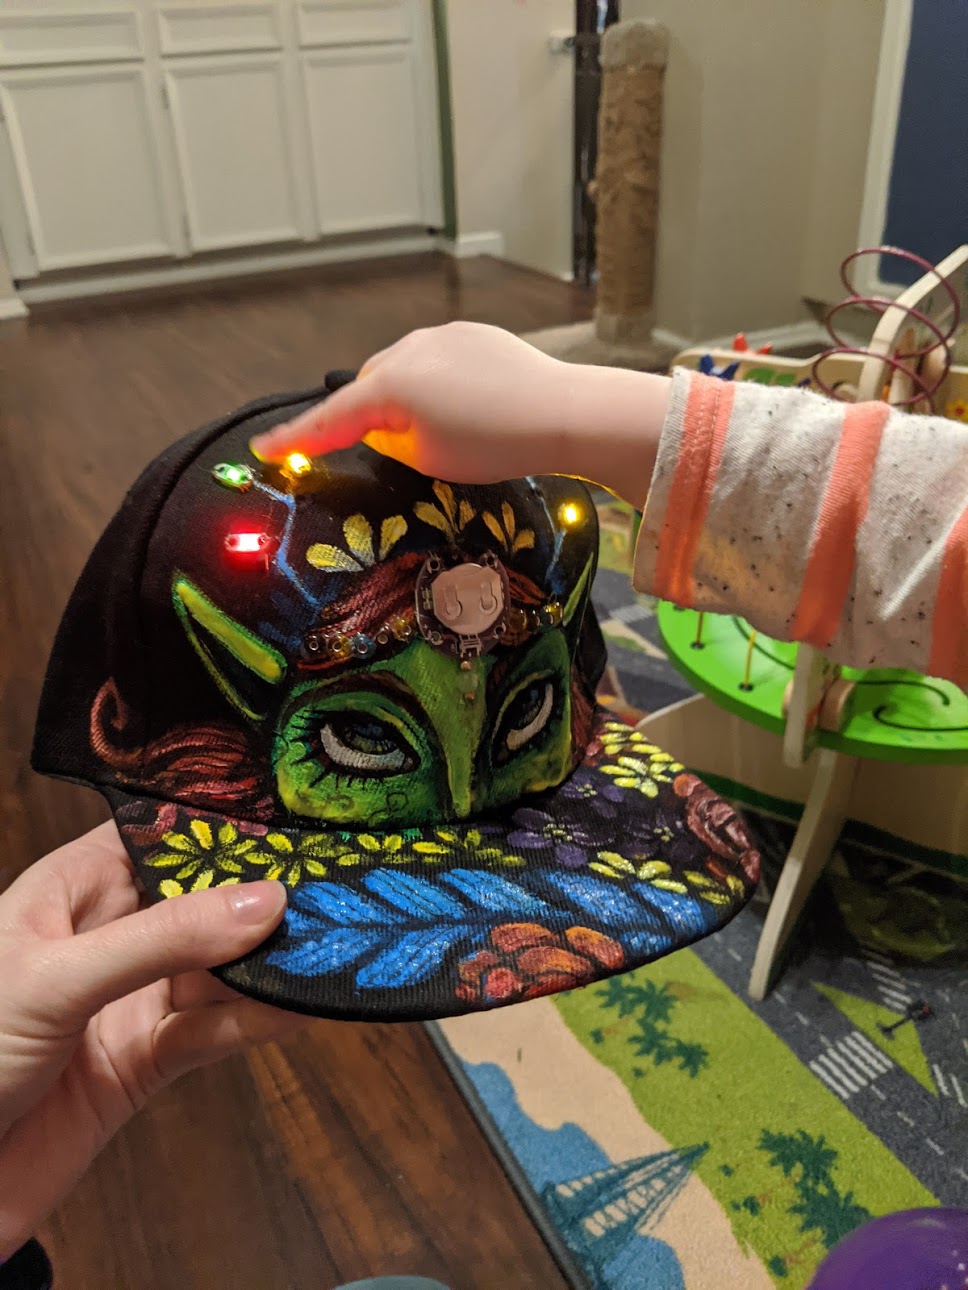
I had some more fun with LED Sequins! This time I sewed the LEDs directly onto the front of the hat instead of peaking through holes. I did this intentionally because I liked the look of the LEDs themselves! Has a DIY kind of look to it. I also used the battery and battery pack as part of the little monster’s headdress. So the steps I did were as follows:
Supplies:
- LED Sequins
- Hot Glue
- Hat
- Paint (your choice on color. I had black, white, magenta, and phthalo blue)
- Paint brushes! Helpful to have a large one to paint the background and a medium flat to do the fun space clouds
- Conductive thread
- Sewing Needle
- A puncturing tool (a screwdriver with a sharp point can work)
- Scissors
- Sewable battery pack with coin batter
Step 1: Same as before, I drew out my design first, then painted it.
Step 2: Draw out your LEDs, just a little cylinder with a positive and negative indicator. Draw a line connecting all the positive dots together and the negative dots together. Make sure they do NOT cross lines. You may need to rotate your LEDs to avoid any of this. Decide where you want to but your battery pack. It’s a good idea to do this on a piece of scrap paper or on your computer first. If you want to see an LED diagram that I drew, check out this project: LED Constellation Canvas
Step 3: Heat up that glue gun. You’ll need it soon!
Step 4: Glue down all the LEDs. Make sure your positive and negatives are oriented correctly with your diagram. If you are like me, you might have to do some last minute changes to the plan. Don’t worry about it if this happens to you too. Just make sure your positive and negative lines don’t cross!
Step 5: Now you an sew the LEDs to the hat. Let the stitches be mainly on the back of the hat. You can do long stretches of thread to connect your LEDs, but you might want to pivit on a stitch or two if you have to travel around other LEDs to get there. Sew three stitches onto each end of the LED to make sure there is enough conductive thread connecting with each LED end. Connect all the positives together in one line and lead it back to the positive side of the battery. Now connect all the negatives together and lead it back to the negative side of the battery. There are actually two positives and two negative sides of the battery, so you can actually split the LEDs up and use either side. As long as positives go to positive and negatives go to negative.
Step 6: Take a piece of felt and glue it to the inside of your hat to cover up your exposed conductive thread.
Step 7: Slip the battery into the pack and turn it on!!! Put that hat on your smart little nog!